Whether you’ve played around with Discord bots, Automatic1111, or are completely new, this post will have you generating AI images with Stable Diffusion and ComfyUI quicker than you’d think.
Installation
Linux
If you’re on a Linux-based OS, this won’t be too difficult.
For the prerequisites, you will need:
Once installed, clone and enter the ComfyUI repo from GitHub
1 | git clone https://github.com/comfyanonymous/ComfyUI <directory name if required> |
Next, create and activate a virtual environment to hold all dependencies (and not break system-wide pypi packages)
1 | python -m venv ./venv |
In the second line above, you can replace activate with a shell-specific version: activate.fish for the fish shell, activate.csh for the C shell, etc.
Once inside the virtual environment, install the required pypi packages
1 | pip install -r requirements.txt |
Next, install extra packages depending on your graphics card
NVidia
If using an NVidia card, install pytorch and xformers
1 | pip install torch torchvision --extra-index-url https://download.pytorch.org/whl/cu118 xformers |
AMD
If using AMD graphics, install pytorch and ROCm
1 | pip install torch torchvision --extra-index-url https://downloads.pytorch.org/whl/rocm5.4.2 |
“Torch not compiled with CUDA enabled”
If you get this error when starting, uninstall pytorch
1 | pip uninstall torch |
Then, reinstall pytorch for your graphics card as above.
Windows
Installation is as simple as downloading the file from the GitHub repo called ComfyUI_windows_portable_nvidia_cu118_or_cpu.7z, and extracting it to a disk with plenty of space - if you plan on downloading extra checkpoints, LoRAs, etc. you will need around 20GB for a small set.
Inside the folder, there is a folder called ComfyUI that is the root of the installation.
It is also worth installing git, as it will come in useful when using plugins.
You can start ComfyUI with the run_nvidia_gpu.bat file if you are using an NVidia GPU, or the run_cpu.bat if you don’t.
Acquiring Checkpoint Models
The first thing to do when beginning your Stable Diffusion journey is to get Checkpoint Models - sets of trained data for generating images in either a particular, or general style (I’ll refer to them as just checkpoints from now on).
Civitai is probably the best place to download checkpoints once you’re more familiar with Stable Diffusion, but for now, I’ll be using the base Stable Diffusion v1.5 checkpoint. The base checkpoint is useful for starters due to it’s versatility.
Download the checkpoint from the HuggingFace repo - it’s the file named v1-5-pruned-emaonly.safetensors, and should be placed in the folder: <ComfyUI_root>/models/checkpoints/.
Your First Image
After completing the installation steps above, start ComfyUI from inside the virtualenv
1 | python main.py |
If you’re no longer inside the virtualenv, you can re-enter it by running the command source ./venv/bin/activate when inside ComfyUI’s directory
You should eventually see the output
1 | ... |
After the server has started, open a browser window and navigate to the URL specified, e.g. http://127.0.0.1:8188, and ComfyUI will greet you with an example workflow
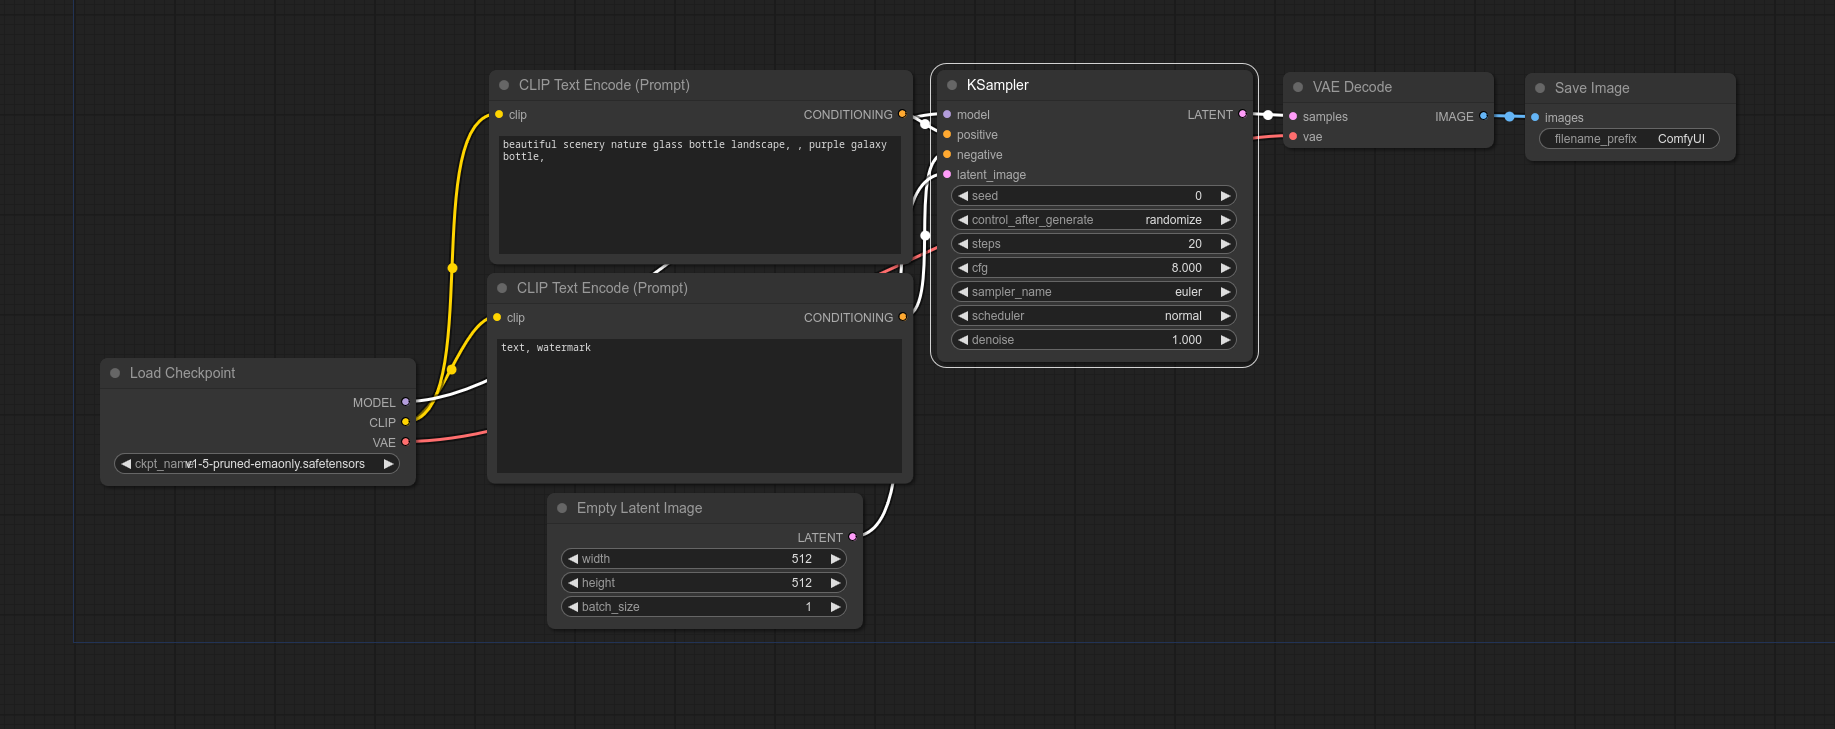
Clicking the “Queue Prompt“ button on the control bar will initiate the generation of your first image - it might take a while, as it needs to load the checkpoint (4.27GB!) from disk to memory.
And there you have it! Your very first AI-generated image!

Plugins!
While there is plenty of functionality in the base ComfyUI, there is exponentially more available through plugins.
To make the management of plugins easier, you can install the ComfyUI-Manager plugin.
1 | cd custom_nodes # While inside the ComfyUI root directory |
Next, restart ComfyUI to load the plugin, and you should be able to see a new Manager option on the control bar.
In future guides, we will make extensive use of this plugin, so keep it handy!
Fin
That’s all, Folks!
After completing this guide, you’ve taken your first step towards generating images limited only by your imagination.
Further guides will be released detailing more advanced and specific topics, so keep an eye out!
This is simply a guide to using a tool. The author, nor the owners of Herty.xyz are responsible for anything you decide to do with the tools described in this guide. Please use AI responsibly and morally, as irresponsible and immorral usage is -aside from being immoral- what drives the creation of restrictive laws and regulations that also hurt those using AI responsibly.
Click here to read my full statement on the usage of AI.
A GPG signed version of this post is also available.