To anyone who’s happened across this blog, welcome!
In this post, I’ll cover the process I went through to get a Hexo blog running on a Docker server.
This guide will cover installation on a server running Debian 10.
Setting up Docker
If you already have an installation of Docker up and running, then you can skip this section!
Begin by logging on to your server and updating the package manager’s package lists
1 | sudo apt update |
Next, install the prerequisites for installing apt packages over HTTPS
1 | sudo apt install apt-transport-https ca-certificates gnupg2 software-properties-common curl |
After this, you can add the official Docker repo’s GPG key to your system
1 | curl -fsSL https://download.docker.com/linux/debian/gpg | sudo apt-key add - |
Add the source to apt’s source list
1 | sudo apt-add-repository "deb [arch=amd64] https://download.docker.com/linux/debian/ $(lsb_release -cs) stable" |
Now, update the package lists again
1 | sudo apt update |
And install Docker from the newly-added repository
1 | sudo apt install docker-ce |
Finally, you can start the Docker daemon and add your user to the Docker group, so that you can use Docker without sudo
1 | sudo systemctl enable --now docker |
Installing Hexo
For the purposes of this guide, I’ll be using the spurin/hexo Docker image.
First, you’ll want to ensure that Docker is running, and that you have permissions to use it:
1 | docker ps -a |
If successful, you should see an output of an empty table with the headings: CONTAINER ID, IMAGE, COMMAND, CREATED, STATUS, PORTS, and NAMES.
From this point, starting the container is fairly simple
1 | docker start -d \ |
You’ll need to replace mydomain.com with the domain that you eventually plan to host Hexo on, the Github details with your own details, and /data/blog with the path of a local directory where Hexo will store your files.
When typing the command, you can also omit the backslashes (\) and newlines - they’re only here to make the command easier to read.
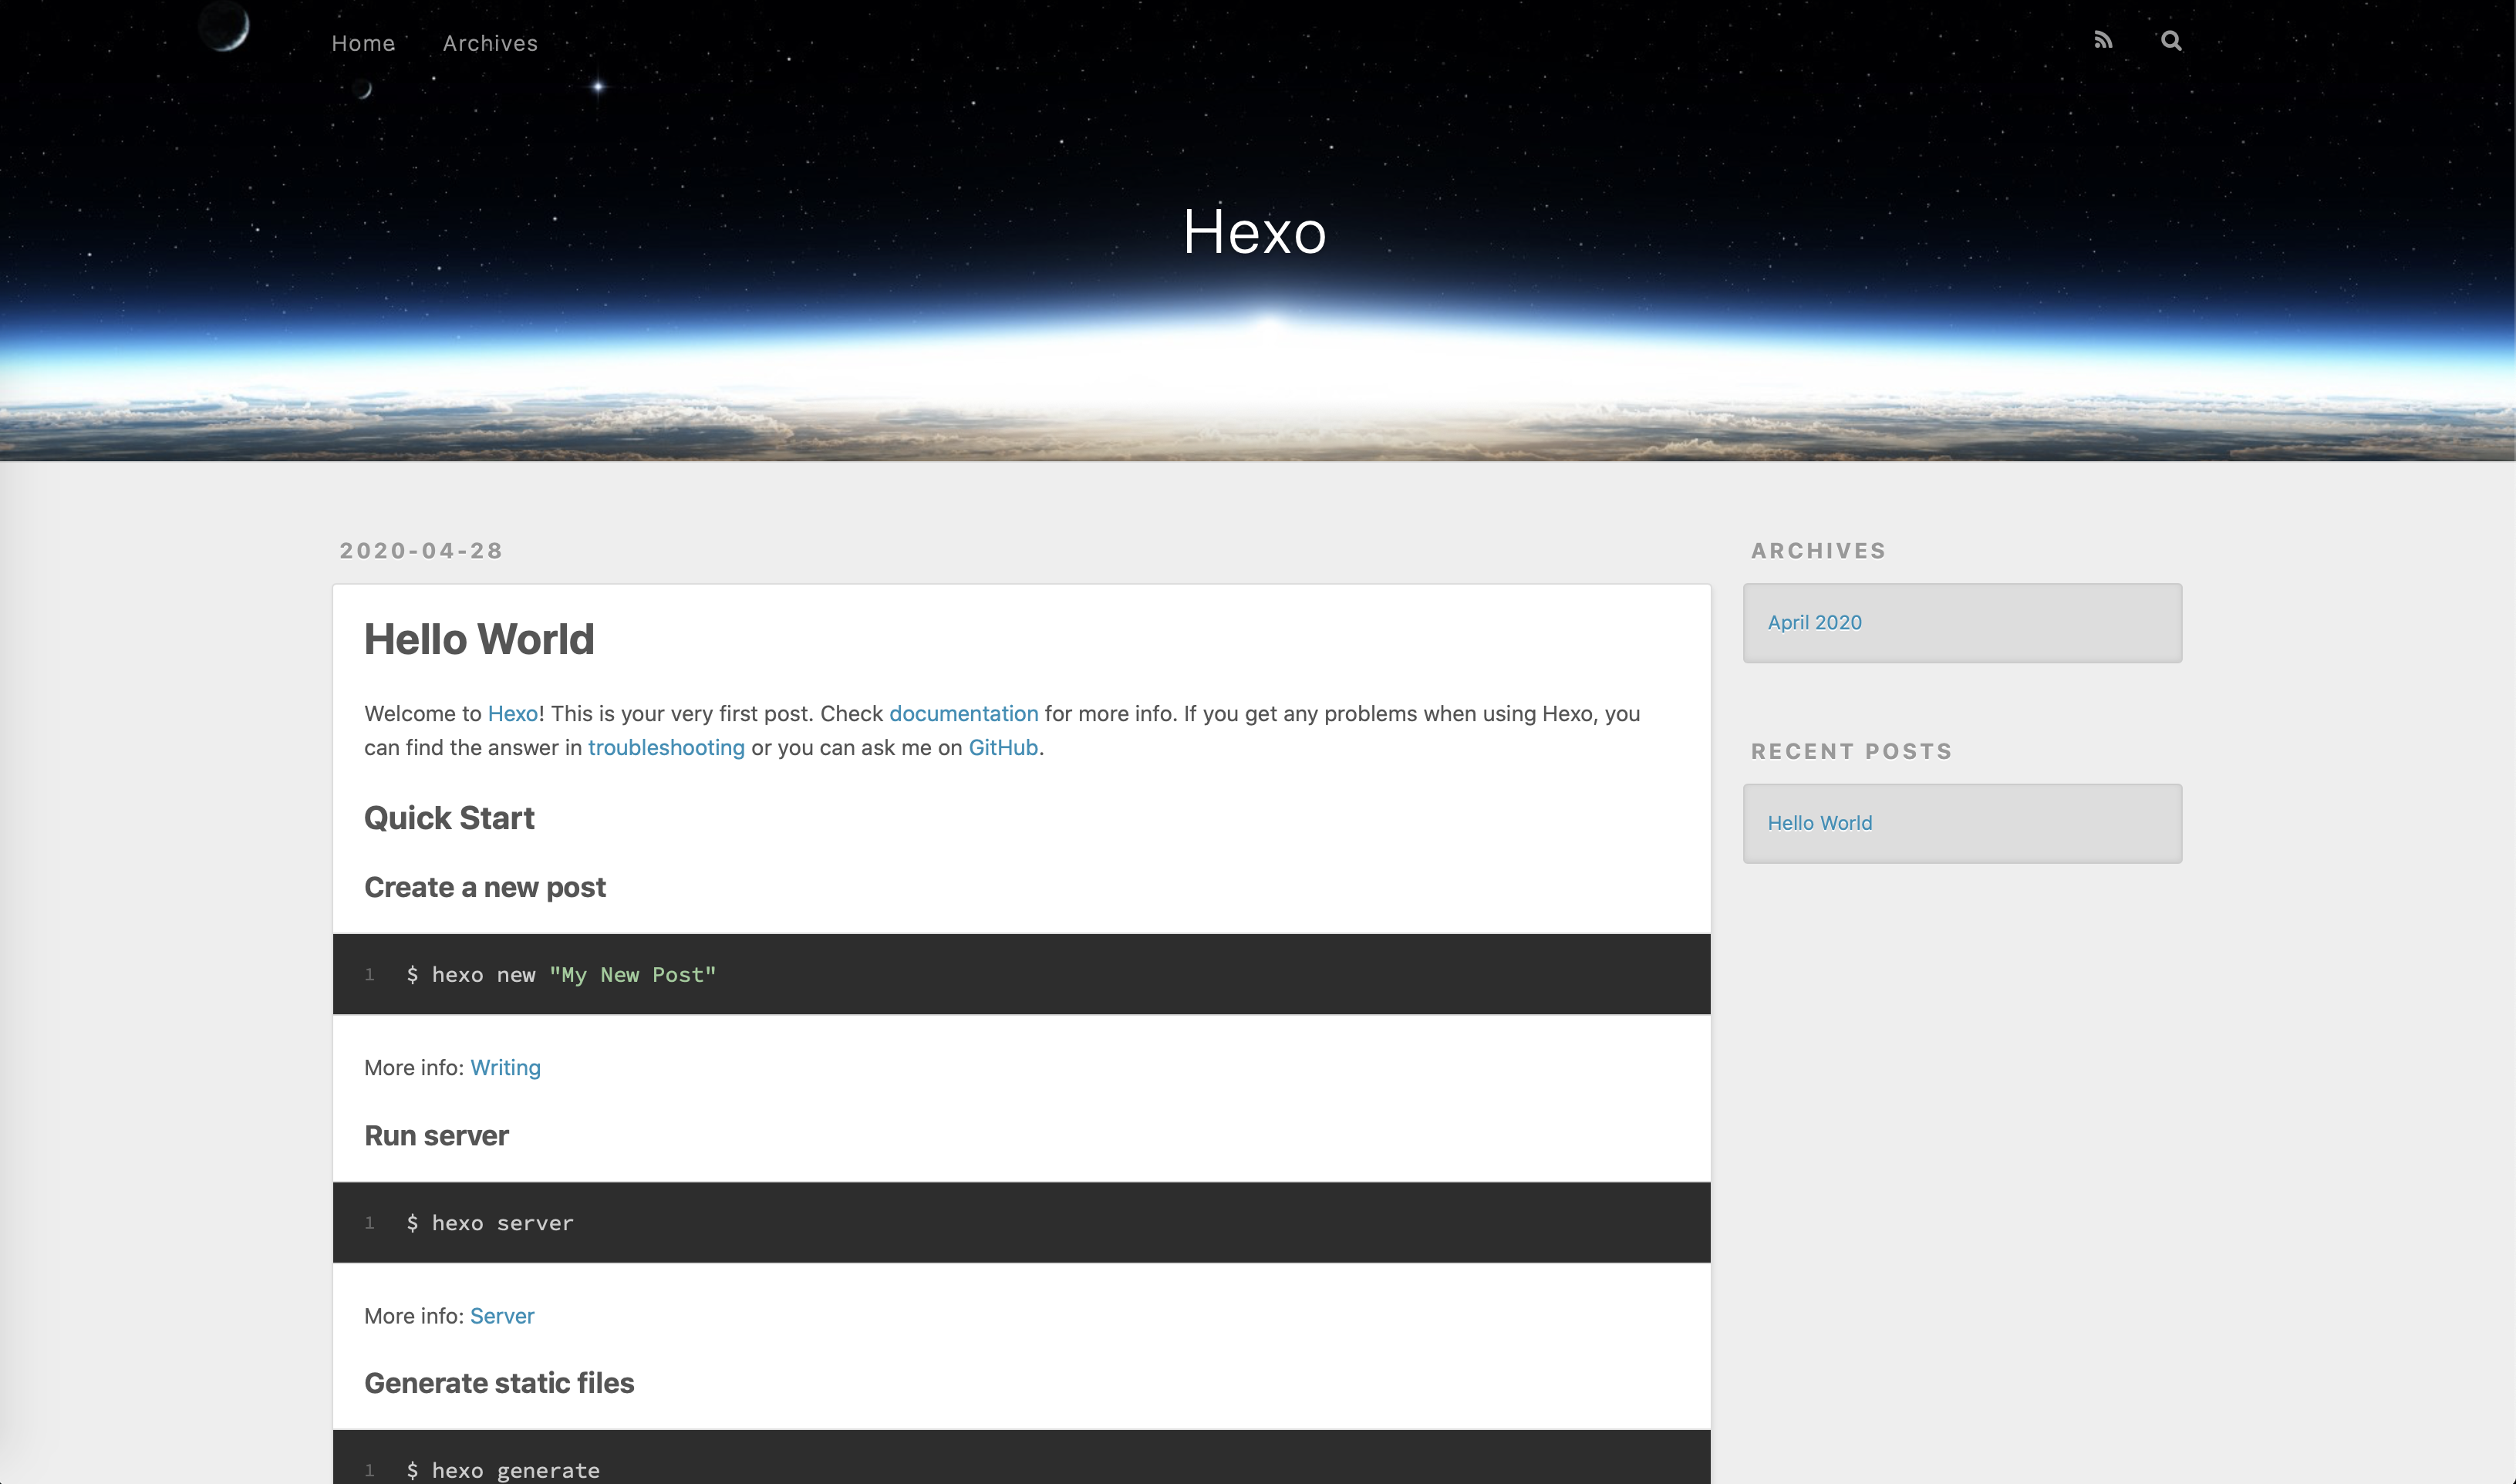
Testing your Instance
After running the docker start command above, the server will start listening on port 4000.
You will be able to see the “Hello World” post by visiting http://<your server IP>:4000, where the IP (if your browser is on the same machine as Docker) will be 127.0.0.1.
Once you have tested that this is working, you can get started on your very first post (replacing mydomain.com with your container’s name)
1 | docker exec mydomain.com hexo new post "My First Post" |
You can edit the file to update the post - located in <root>/source/_posts, with the title My-First-Post.md.
If the post doesn’t show up straight away, you can tell hexo to regenerate the pages with the following command
1 | docker exec mydomain.com hexo generate |
That’s all, Folks!
All done, you’ve got yourself a nice new Hexo blog, ready for you to express yourself however you see fit!
Theming
With regards to changing the theme, I’d recommend checking out Hexo’s own theme list. Each theme will have it’s own methods for installation and configuration, so I won’t cover it here.
Plugins
In much the same way as themes, I’d recommend checking Hexo’s own plugin list, and again, check each plugin’s own installation instructions.
A GPG signed version of this post is also available.